
Посмотреть палитры рисовалки крита все какие есть
Обновлено: 13.05.2024

Looking to start a career in digital arts or pretty much established? There’s a free software that should be part and parcel of your toolkit. Its name is Krita.
Krita is a free and open source software that has fast performance and extensive features making it a favorite for concept designers, illustrators, 2D artists, 3D artists and visual effects creators alike.
A trusted and safe haven for all digital artists. The user experience of this software is off the chain and boasts of a combination of pen buttons, icon-based HUD and keyboard modifiers to ensure all mostly used function are accessible in fewer clicks. It’s core layer and mask features span across multiple level layer groups, select multiple layers, drag and drop layers and layer highlighting.
Don’t still understand how powerful this free software is? Let’s take a deep dive into the world of Brush packs on Krita. Whether you’re a newbie in the world of digital arts or a pro.
By the way, I´m sure my Recommended Art Supplies and Gear page will be very useful to you if you are searching for honest reviews on digital tablets, pens, and art supplies in general.
Now let´s continue, with the list of the top 25 brushes and brush kits for Krita you should totally try out and they’re totally FREE:
1. Krita Cheat Brush Pack Heads

This brush kit created by Marts-Art is a great toolkit for digital artists who are just starting out to learn and for the intermediate digital artist to speed up their work. The entire collection features simplified angles of 15 heads.
It has become quite known, that one of the most complex aspects of drawing is drawing the head and getting its features like the nose, mouth, and eyes n the right position. This brush head pack comes in handy as a great resource for detailed work and speed when creating artwork.
You can learn more of the capabilities of these brushes on YouTube.
2. Minimalist Brush Pack

Created by Aliciane out of a growing need to help others just trying out the Krita Software for the first time. The updated version of the Minimalist brush pack features the pencil brush, flat wet brush, opaque brush, airbrush, move tool, blur tool, smudge tool and two additional brushes to take your digital artwork to sky-high level.
It’s a great way to improve your blending and coloring. She even ranks Krita as the best open source digital painting program that she has used. Just so you know you are in great hands. Looking for an easier way to download the Minimalistic brush pack? You can download through Google Drive here.
3. Krita Brushkit Version8.2

In this brush kit, you get a whopping 64 brushes. Isn’t that amazing? This brush kit was created by artist, David. From 2011 till date, he has created brush kits and constantly shared them for free over the years. What I also love most about this brush kit is he took the time to explain the functions of each brush, making it easy for users to choose the right tool for their art process.
David is a digital artist who is a staunch supporter of the open source community. He also has a webcomic known as Pepper & Carrot. You can learn and view more of his work on Patreon.
4. Charcoal Pencils

David Revoy makes another debut on this list with this amazing brush kit inspired by charcoal pencils, colored pencils, and pencils. With brushes you could either choose a medium or light stroke based on what you aim to achieve with your drawing. Another awe-inspiring thing to note is you’re not limited to the colour black for your pencil, you can use any colour that you want to as your charcoal pencil brush tool.
To get your hands on this great brush kit, visit this link. You can also watch a very explanatory video on the tool kit, its use and how to use them on YouTube.
5. Krita Modular Brushes Version 4

It comes pre-loaded with 122 presets, tilt sensor support and works fantastic with Krita 2.8.
His goal for releasing this tool is to give you the perfect tools to help bring your imagination to a canvas without any sort of limitations.
If you another version other than Krita 2.8, there’s a new version of the brush sets now available for download on Krita 2.9. Get the Modular Brush set V5.0 here.
6. Krita Watercolor Set V1.01

One of the best brush sets out there to create stunning watercolor paintings. These sets of brushes were created by Vasco Basque to help digital artists master the art of using simulated watercolors on projects.
Download this brush kit for free on DeviantArt.
7. Comic Page From A to Z Using Krita

A very in-depth video tutorial by David Revoy on how to make a comic page using the Krita software. It’s also a great way to learn how to use Krita when starting out as a newbie user.
His French accent while teaching makes the video a joy to watch as he explains every step in the most basic form possible.
You can find a zip pack with all the tools mentioned in the video for free here.
8. Floral Brushes

If you are a lover of flowers, then this a great resource for you. This free brush kit created by Jshinncreative consists of new floral brushes to help you in creating your next visual floral work design.
You can find the link to download at the top right corner of the page.
Jonathan, also known as Jshinncreative is a digital artist based in the United Kingdom. His work holistically places a focus on nature and interplanetary bodied. Explore his work here.
Don´t forget to check my article on The Best 24 Free Krita Tutorials, so you can learn the bist painting tips and techniques for Krita.
9. Hair Brushes & Smudge Brushes

Created by a digital artist known as Motokazu Kawai. The smudge brushes give the feeling of a comb in your digital artwork.
It’s the right tool kit for drawing the hair of a male or female with all the effects you would get in a real life.
You can download the hair and smudge brushes on this page. It comes with a detailed write up on how to properly install the brushes on Krita.
10. Material Brushes

The perfect brush kit for creating magical special effects in your painting. The Material Brushes was created and assembled by visual artist, Jshinncreative. He also used presets from a Krita Developer named Wolthera.
11. Krita Comics and Cartooning Bundle

This brush set was developed by Saeger Ryman. It’s a great toolkit for cartoon and comics creators. The kit was uniquely designed for 300dpi and includes emulations of typical cartoonist tools. You can get the brush kit here.
Saegey is a digital artist and hobbyist based in the United States. His work places a focus on drawing and painting Japanese manga characters.
12. My Paint Leaf Brush

Digital artist, Taleclock creates a unique custom brush for painting leafs. This brush was created using my My Paint and gives a very outstanding finish when it comes to the art of leaves.
You can view more of his celestial work amongst other things as a visual artist on Tumblr.
13. RZV Krita BrushKit

This is the newly upgraded version of the brush kit was created by Razcore for Krita Version 4.0. According to him, creating this brush set was inspired by the speed tutorials on software like Corel Draw and Photoshop made by artists like Sinix, Atey Ghalian, The Art of Aaron Blaise Simon Stale, Sergey Kolesov and Marco Bucci.
14. Acryl Brushset

This toolkit comes pre-loaded with a set of seven acrylic brushes for you to use. Created by Vasco Basque yet again, these brush sets come in handy for creating great effects on your painting.
15. Custom Grass Brushes
Racking your brain on how to get the perfect grass scenery has now become a thing of the past. Thanks to this amazing custom grass brush set created by xGreatCthulhux.
It’s the perfect way to capture landscape looks and nature as a whole using the Krita Software for your digital painting.
Have a sneak peek of a painting where the custom grass brush was used here.
If you don´t did it yet, remember to don´t forget to check my article on The Best 24 Free Krita Tutorials, so you can learn the bist painting tips and techniques for Krita.
16. Hushcoil 2018 Brushes

An exciting collection of 280 brushes for you to work with and choose from. This brush kit provides a range of uses for basic drawing, sketching, drawing and more detailed work.
It goes further to bundle the brushes in 4 packs based on the genre which consists of Concept, Paintbrush, Basic, Pen, and Pencil.
You can download as individual packs using this link.
They go further to note were designed to work in high-resolution canvases and also state that you should restart Krita upon installation of the brushes.
17. Krita Mix Brushes Bundle

A miniset of paint brushes for Krita Software 2.9. I particular love the various dimensions of coat of painting you can achieve with these brushes. You can either decide to use the blend and paint for background colors, enhance main silhouettes with the opaque brush and ‘wet blend only’ t break noisy edges. With other sets of brushes in the toolkit you are sure to find something that suits your current needs.
You can find a detailed breakdown on how to install the brushes on Krita and also download the brush sets here.
Also, learn more of David Revoy’s work on Patreon.
18. Basic Pencils by JshinnCreative

Achieving fine detail in your drawings now at your finger tips. The Basic Pencils Bruhkit created by digital art professional Jshinncreative is sure to bring out the intricate beauty in your work.
You can download the Basic Pencils Brushkit here. Take a look at more work done by Jshinncreative on DeviantArt.
19. 21 Brushes by BaukjeSpirit

The cool thing about this set of 21 brushes is that they can be used on Krita, Adobe Photoshop and GIMP. Make the perfect arches in your drawings with these bad boys and have us to thank for it.
You can view a speed painting done by BaukjeSpirit using this same brush kit here. Something beyond phenomenal.
20. Brush Preset Duo Bundle

Visual artist, David Revoy developed this small bundle brushes while working on the episodes of Pepper & Carrot, his webcomic.
You can download this great brush set here. Make sure to read through the installation instructions on the page before download to ensure it’s done the right way.
Watch a short tutorial on the functions of each brush and how they work on YouTube.
21. Jackpack Krita

This brush kit would come in great use to draw, paint, using ink, water and creating any special design in your art. Most of these brushes will work outside Krita v4.0 and some are also ink brushes that were created for the sake of speed in drawing and painting. As such, will work in symmetry mode and non-symmetry mode depending on the choice of brush you make.
Absolutely free, download the brush bundle here.
22. Brushes Preset Pack Version 2
Comic creators are in for a treat with this toolkit of brushes. Coming in a pack of 2 with a total of 36 brushes, you have a wide array of brushes to choose from.
The first pack is the Art pen and the second is named the Generic Pen. There are also three new tools to be on the lookout for in this toolkit. They are the Aboriginal Dots, Ink Power Rectangle and Clone Tool.
Find also that the basic brushes have a greater blending mode that gives better results when a stroke overlaps a stroke.
Created by Camille Bissuel, download the brush kit for free here. Take note of the installation guidelines on the same page.
Learn more about Camille’s work.
23. Aldys Brush Pack

This brush pack was specifically created for Krita 2.3.1 and as such may not work on other recent versions of the software. No worries though, taking a look at the work Alvaro the creator of the brush tool. You’ll have a million reasons why you have to download this toolkit.
View some of Alvaro’s work and download the brush kit for your use on DeviantArt.
24. Brush Pack by Raghukamath

This is the second updated release of this brush kit to better take advantage of the new parameter feature on Krita known as ratio. The brushes create a very unique stroke and bring a new look to your illustrations and painting on the Krita software.
You can download the brush pack for free here.
Raghavendra Kamath also known as Raghukamath is an Indian illustrator designer based in the city of Mumbai. To get more knowledge on his work, visit his website.
25. Modular Brush set by Vasco Basque
Twice the charm. This brush kit is worthy of mention yet again just because of how remarkable it is.
Here are some cool features of the brushes and why they are an absolute must try. First, this is a wonderful brush set and the digital art community can attest to it. Secondly, there is also another upgraded version of the software known as Modular Version 5.0 for Krita 2.9. Thirdly, taking a look at Vasco’s work, if you draw of nature-themed art, these brush kit is a must-have.
It’s amazing how much the community is looking to help out budding digital artists through giving back and also helping other visual illustrators be the best they can be. Take a look at each of the brush sets and find the ones you would love to try and use on your next project. If this article has helped you so much, don’t hesitate to share with others. Have massive fun painting!
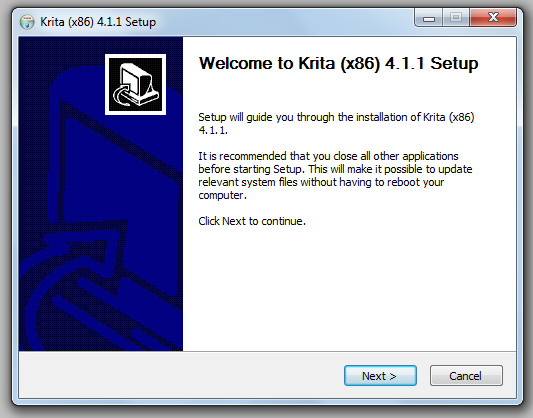
Установка на компьютер
Запускаем установочный файл:
Принимаем условия лицензионного соглашения:

Выбираем папку для установки программы:

Выбираем компоненты для установки, лучше выбрать все:


Подтверждаем установку программы:


Если Вам нужен векторный графический редактор, то рекомендуем воспользоваться бесплатной программой Inkscape для Windows.
Вам также может быть интересно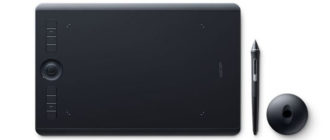

Скачал свежую версию Криты и возник вопрос, как правильно сделать: сначала удалить старую версию и потом установить новую или сразу установить поверх старой? Вдруг какие-то конфликты появятся?
Привет! По умолчанию, программа при установке сама должна снести старую версию из системы.
Горячие клавиши
Install:
TL;DR: Download the ZIP, it contains a *.bundle file. If you know how to install bundle files in Krita, you can skip all the detailed instructions under :-) Install the bundle (detailed version):
1. Download the zip file
2. Extract deevad-palettes.bundle (inside the zip file) somewhere on your disk. Remember the folder.
3. Open Krita 3.1.2 or better.
4. Go to Settings > Manage Resources and press the Import Bundle button.
5. Find with the file dialog the deevad-palettes.bundle file
6. After selecting the files, you should see it loaded in the active bundle column.
7. Press OK to close the Manage Resources dialog.
8. Important: Restart Krita.
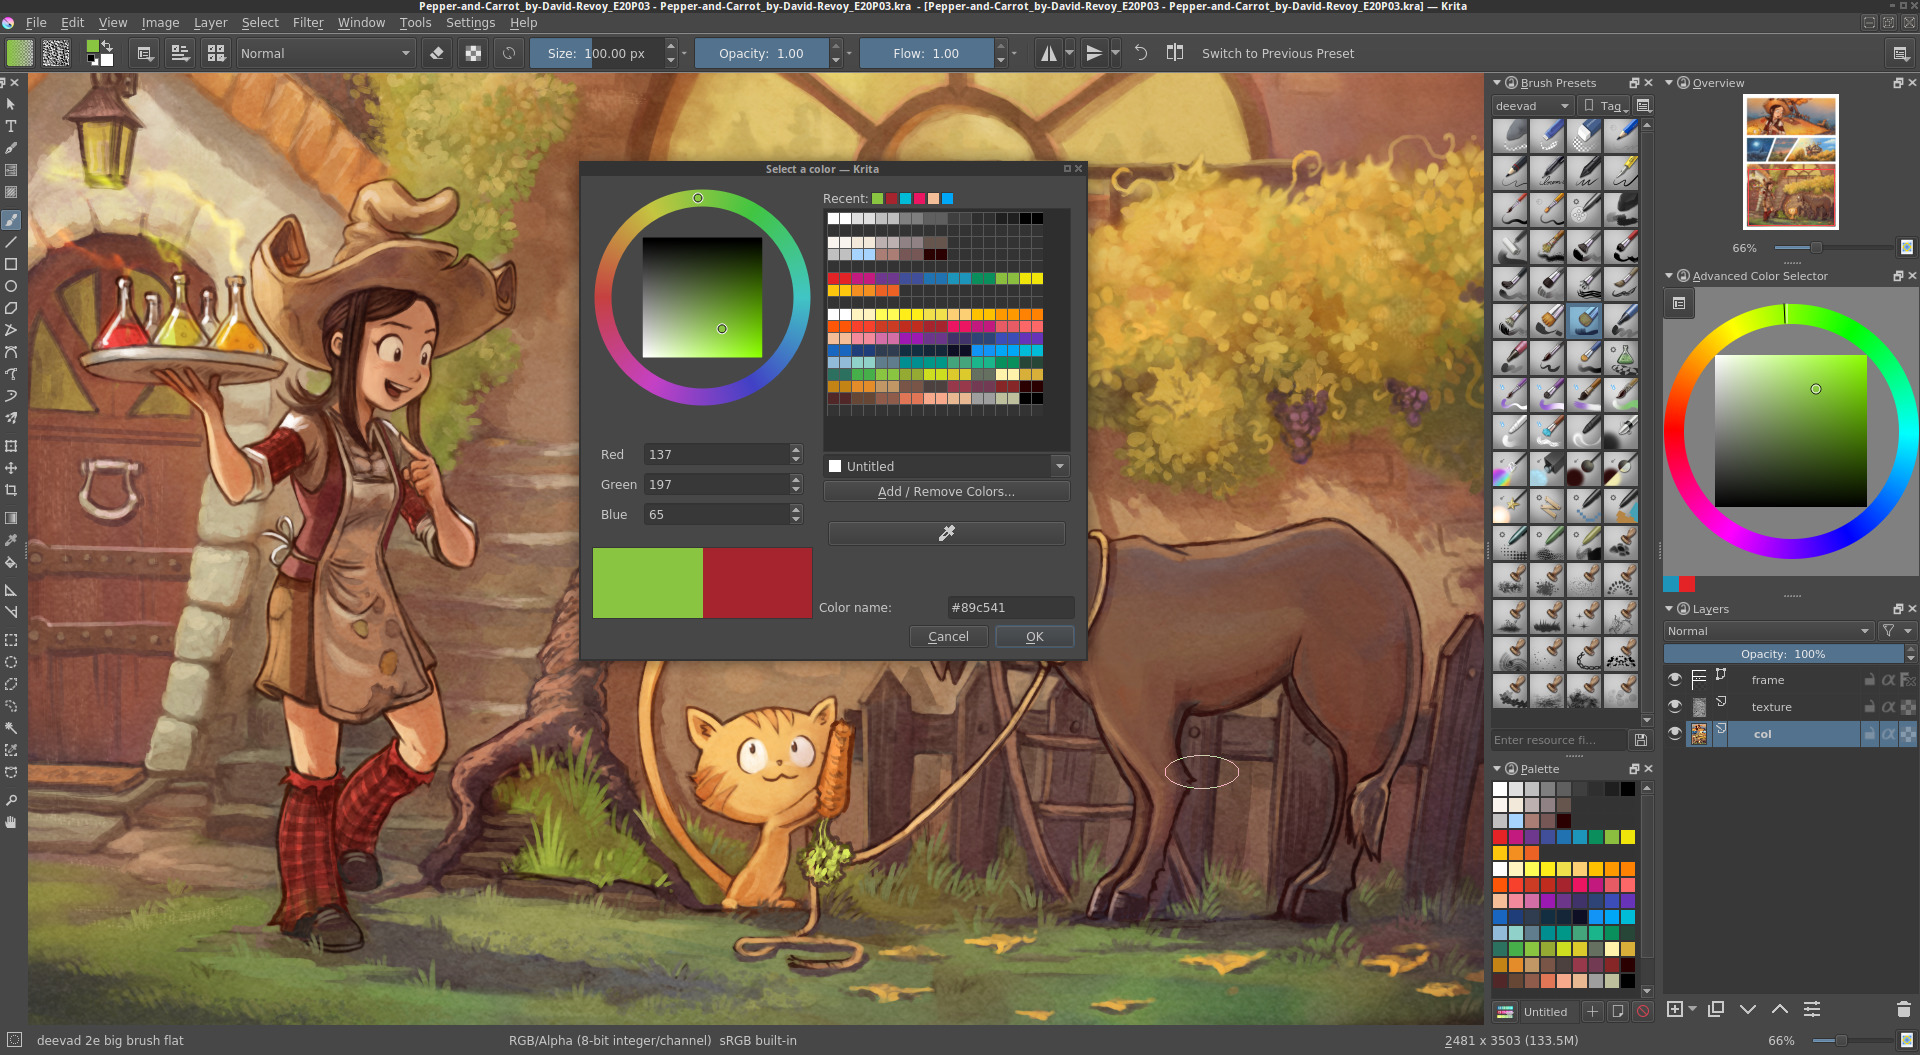
The palettes loaded on both dialogs. Artwork: episode 20 of Pepper&Carrot
(click to enlarge)
Krita palettes

While painting in Krita, I was still switching palettes; between my old previous palettes, the one I added on Krita default and two other created on the fly for Pepper&Carrot. All this switch of palettes coupled with the current docker not rescaling the column of the palette made me less and less tempted to use palette. But having a good palette is something really important. A good one can really make a big difference in the quality of the color accents, large painted areas and mood of a painting. So, during an early spring cleaning, I decided to clean up my palette sets for Krita and simplify a bit the situation and improve my daily life with having the same one in all dialogs and quick access to everything I'm looking for. This palette is not a huge collection of colors, with gradients, color scheme, references and all. It's just a collection of my favorites colors and shortcuts, the one I struggle to find manually on the Advanced Color Selector docker. You want an_ olive green? _check! a indigo blue? got it! Lemon Yellow? of course! etc. etc. It's a painter set of colors sorted the way painting tubes come out of the box. Even if this palettes are customized to my specific needs, I thought you might be interested to use it too. That's why I'm sharing them today. I hope this file will put good colors in front of your eyes! Enjoy!
Ключевые преимущества для работы с цифровой живописью
Пользовательский интерфейс
Интуитивно понятный пользовательский интерфейс: панели можно перемещать и специально настраивать под конкретный рабочий процесс. Настройку рабочего пространства можно сохранить. Вы также можете создавать свои собственные ярлыки для часто используемых инструментов.
Стабилизаторы кисти
Добавьте стабилизатор в кисть, чтобы сгладить ее. Krita включает в себя 3 разных способа сглаживания и стабилизации мазков кисти. Существует даже специальный инструмент Dynamic Brush.
Всплывающая палитра
Быстро выберите свой цвет и кисть, щелкнув правой кнопкой мыши на холсте. Кольцо за пределами селектора цветов содержит самые последние используемые цвета. Эти настройки можно настроить с помощью настроек.
Поддержка PSD
Загружайте и сохраняйте в формате PSD, когда вам нужно работать в разных программах.
Системные требования к компьютеру
- Операционная система: Windows 8 и выше, Mac OSX 10.12, Linux
- Объем памяти (ОЗУ): 4 Гб и больше
- Желательно GPU: OpenGL 3 и выше
- Поддержка графических планшетов: Wacom, Huion, Yiyinova, Surface Pro
Программа Krita доступна как в 64-битной версии, так и в 32-битной версии. Кроме того, вы всегда можете скачать и портативную русскую версию (portable):
Также на нашем сайте можно найти обучающие материалы по работе с графической программой Krita.
Предлагаемая версия с официального сайта проверена на вирусы. Программы, скачиваемые через торрент, не гарантируют этого. Руссификатор для программы не требуется!
Посмотреть палитры рисовалки крита все какие есть

Download Krita 4.4.8
Apple iPads and iPhones are not supported
Maintained by the community. Hosted on Flathub.
Store version
Paid versions of Krita on other platforms. You will get automatic updates when new versions of Krita come out. After deduction of the Store fee, the money will support Krita development. For the Windows store version you will need Windows 10.
Nightly Builds
Test out the latest builds that are created every day.
- Krita Plus (Windows | Linux | macOS ) - Daily builds of what will become Krita 5.0. Install at your own risk! It's alpha!
- Krita Next (Windows | Linux | macOS ) - Daily builds mostly the same as Krita Plus, but may be slightly ahead with some new features. Install at your own risk.
Windows Shell Extension
The Shell extension is included with the Windows Installer. An optional add-on for Windows that allow KRA thumbnails to appear in your file browser.
Source Code
Krita is a free and open source application. You are free to study, modify, and distribute Krita under GNU GPL v3 license.
Download Older Versions
If the newest version is giving you issues there are older versions available for download. New versions of Krita on Windows do not support 32-bit.
GPG Signatures
Что это такое?
Справка. Krita- бесплатный редактор, с открытым кодом, является часть программного обеспечения KDE. Ранее входил в пакет Calligra Suite, но потом отделился и стал самостоятельным проектом. Работа над ним началась в 1999 году,название было другое. В 2002 году редактор получил сегодняшнее имя.В 2015 году в рамках удачной программе на Kickstarter удалось собрать достаточно средств для выпуска улучшенной версии 3.0, что существенно повысило производительность инструментов, реализовалось больше возможностей,а также обеспечить распараллеливание операций вычислений для работы фильтров.

Новые обновления выходят до сих пор, а большое комьюнити пользователей выпускает новые кисти,фильтры и другие утилиты чуть ли не каждый день. Главная особенность редактора- направленность на художников, то есть предполагается, что вы будете делать изображение с нуля, а не загружать и редактировать готовое.
Интерфейс
На 2019 год последней версией является 4.2.5.
Русский язык в прошивке есть, а интерфейс очень похож на Adobe.
Тем, кто раньше работал с фотошопом или программой Gimp, все будет более чем ясно, а для новичков много сложностей не возникнет, интерфейс интуитивно понятный.
Внимание. Боковую панель с инструментами можно двигать, как и все остальные.Кисти по дефолту расположены в списке сверху, а выбранные вами отображаются снизу справа. Активация слоев находится под colour selector. Перед началом работы выходит окно, где можно задать параметры для будущей картины.
Рабочие области приложения для рисования
- Меню программы – находится сверху и открывает опции для обработки документов.
- Верхняя панель инструментов -находится сразу под меню. Здесь можно настроить основные инструменты для рисования:палитра, градиенты,некоторые параметры для кистей.
- Панель инструментов – находится по левому краю окна, здесь вы можете выбрать кисть для рисования.
- Рабочая область – здесь отображается само изображение.
- Настройки кисти и слоев -область справа от рабочей области, позволяет менять различные настройки кисти.
- Статус бар – находится в самом низу окна, здесь отображается масштаб и прогресс рисования фигур.
Source code:
The source code is available here on Github. TO-DO:
- Name colors: if someone feels motivated, with this style (traditional pigment name).
- Add other popular pigment if missing
- Check how this 8bit *.gpl format behaves with 16bit color mixing
- Add and improve the color shortcut: industry standard color for sketching? for shading? for adding notes?
- Possibly find a way to add complimentary color under the third line color rainbow (shortcut).
Линейки инструментов
Благодаря панели инструментов у художника всегда под рукой нужный набор функций. Такая структура графического редакторы значительно ускоряет весь процесс создания изображения, особенно если используете планшет.

Выбор рабочего пространства находится в самом конце панели инструментов справа. Позволит вам загружать и сохранять конфигурацию ваших интерфейсов. Несколько вариантов готовых рабочих пространств уже заложены в Крите изначально.
Colors
Colors are pretty, and they’re also pretty fundamental to painting. When painting, we want to be able to access and manipulate colors easily to do fun stuff like mixing them together or matching them to create visual harmony or contrast. We also want to be able to quickly find our favorite shades of red or favorite tints of blue without thinking or working too hard. All of this becomes even more important the more colors we have access to!
Naturally, the first thing we do is organize the colors, usually based on what we see in nature. For example, we tend to order hues in the order that they appear in a rainbow, and we think about brightness of values as a tonal range from white to black. Of course, nature itself is tied to physics, and the order of hues and the concept of brightness has everything to do with the wavelength and energy of light as it bounces around and eventually enters our eyes.

In the case of traditional media, we order the colors (hues) by how they result from mixes of other colors, starting with the subtractive primary colors: cyan, magenta, yellow. Mixing each primary color with each other reveals three secondary colors: violet, orange, and green. Mixing between those colors creates tertiary colors, and so on - the variations of hues between each named color are practically limitless! Thinking of colors in this way creates a circle of hues that artists call “the color wheel”! Each one of these hues can be made lighter (tint) or darker (shade) by mixing with white or black, respectively, and any color can be made less saturated (more gray or muted) by mixing with another color on the opposite side of the color wheel.

In the digital world of computers color is treated similarly, and we order colors by the way the screen generates them; each pixel of color on our screen is produced by combining super tiny red, green, and blue lights of varying intensities. Unlike mixing paint, where light intensity is subtracted by pigment and mixing all the colors together produces a muddy brown or gray, mixing lights is additive - no light at all is obviously black, and mixing all of the colored lights produces white. As such, we can make a list of possible primary color intensities:
Shown above is a table of different intensities of red light. Our screens can certainly create a lot of shades of red, but we only start to see the power of pixels when we add in the other primary colors, green and blue, and show the colors of light that are produced when they are added together! For example, here’s a table showing various mixes of red and green:
But that’s just red and green, what about blue? I guess we can make even more tables to show what happens when different amounts of blue are added into the mix:
This way of ordering colors is probably familiar to you if you have used some programs for making internet applications, like Flash. In fact, if we had made 6 samples instead of 5 per “channel” (that is, per each primary color), we’d have gotten the 216 websafe colors!
Showing the colors in a bunch of tables just feels wrong, though, doesn’t it? That’s because, while our tables are 2D, as we are mixing three primary colors, color can be thought of as 3D! It’s a bit odd the first time you think about it this way, but you can actually stack these tables based on the amount of blue and they become a cube!

This cube is not filled with water, or sand, or even concrete, but colors! Colors are pretty abstract, and we typically talk about cubes and other 3D objects that represent abstract ideas as spaces, hence we call this cube a color space. Because this particular cube uses red, green, and blue as its axes, we say that our cube is in the RGB color model .
There are many more color models. For example, if we were to balance our cube on the black corner, the white corner would be right under our finger at the very top of the cube. And as geometry and maths would have it, if we were to cut the cube in half as we balanced it, the line from the white point at the top to the black point at the bottom would be the grayscale.

When you think about a strip of grays running through the middle of the cube, as we move farther away from that grayscale towards the outer edges of the cube the colors would begin to become more saturated (colorful and vivid). The circle of colors around that middle axis of gray would then define the hue, with a different color in each direction.
This is the basic idea of the HSV, HSL, HSI, and HSY color models . This particular model is called HSI (hue, saturation, and intensity), because it maps each unique color to the intensity of the primary colored lights that mix to create them.
There are other color models, like L*a*b* , where we look at the corresponding gray value of a color first, and then try to describe it, not it terms of hue and saturation, but by how red, green, blue, and yellow it is. Because our brains cannot really comprehend a color that is both green and red, or yellow and blue, this makes them good polar opposites in a sliding scale. We call this a perceptual model, as it is based on how we see color instead of how the color is generated.
Color models describe color spaces, which, in turn, are all sorts of sizes and shapes as well. Krita allows you to do operations in different models and spaces, and we call this functionality “Color Management”.
Color Management is necessary for CMYK (subtractive) support, but outside of that, not many drawing or painting programs offer the feature, as some developers believe that artists have no need for such functionality. What a pity! Especially because Color Management allows for far more cool tricks than just basic CMYK support, and the ability to manipulate colors like a computer can is perhaps digital painting’s most unique quality!
As Krita is giving almost unprecedented control of color, this unfortunately means that there are little to no articles out there on how to use color management for artists or painters. And so, we made this category and hope to fill it up with relatively short articles explaining color-related concepts in a light-hearted and visual manner.
We recommend going over the color managed workflow page next - even if you don’t plan on using it, it will help make sense out of the many features related to colors and Color Management. Other than that, each article should stand on its own and can be taken in at your own direction and pace!
Подробное описание интерфейса
Вспомогательные меню можно перетаскивать и располагать по своему усмотрению. Это напоминает игру в конструктор Лего - все меню и подменю инструментов могут быть видимыми и невидимыми, передвинуты вверх-вниз, а рабочие окна можно размещать в любом удобном порядке, от прямой линии до каскада. Без преувеличения можно сказать - сколько пользователей, столько и вариантов готовых интерфейсов. Возможности настолько гибкие, что все разом их не охватишь, но мы попробуем разобраться для начала с самыми важными функциями, чтобы как можно лучше приспособить их под свои нужды и сделать свое рабочее пространство максимально комфортным для восприятия.

Фиолетовым цветом выделена панель, во многом стандартная для большинства программ. Именно здесь находится меню Файл, с которого и начинается вся работа в графическом редакторе.
Желтым цветом выделена Панель Инструментов. Здесь вы можете выбирать тип кисти, выбирать такие параметры уровень непрозрачности, размер изображения, и прочие настройки.
Голубым цветом выделены подвижные боковые панели, еще называемые Докерами. Их вы можете располагать по всему периметру рабочей зоны.
Розовым выделена панель панель, где перечисляются все активные в данный момент инструменты, а также настроенные вами предпочтения по выбору кистей, режима масок, размера изображения, цветовой палитры, а также шкала масштабирования, при помощи которой удобно уменьшать и увеличивать рабочее окно.
Холст располагается по середине, и в отличии от обычного листка бумаги и даже многих цифровых программ для работы с графикой Крита умеет увеличивать размер холста до бесконечности (разумеется, если вы сами этого захотите!)
Широкий бесплатный функционал программы
Из богатых возможностей Krita стоит отметить большой выбор графических эффектов для стилизации работы под акварель, масляные краски, пикселизацию, постеризацию и многое другое:
- коррекция фотографий
- создание макетов
- создание иллюстраций и комиксов
- расширенный набор кистей, функция «мультикисть»
- возможность работы с файлами .psd , созданными в Photoshop. Можно открывать их, редактировать и сохранять в этом формате.
Стандартные инструменты навигации
Большинство действий, касающихся непосредственной работы с холстом (панорамность, отзеркаливание,поворот и изменение размера рабочей зоны) находятся именно на этой панели. Подробнее:
Панорамность
Регулировка этой функции включается центральной кнопкой мыши, Пробел (Space) + левая кнопка мыши.
Увеличение
Самый простой способ отрегулировать размер холста - использовать клавиши + и -. Для увеличения размера при помощи стилуса используйте сочетание Ctrl + Space или Ctrl + центральная кнопка мыши.
Отзеркаливание
Режим просмотра отзеркаленного изображение быстро включаетсяс клавишей М. Отзеркаливание очень удобная техника при помощи которой бывалые художники могут быстро оценить композицию своего рисунка, и убедится, что он будет одинаково хорошо восприниматься даже растянутый по горизонтали или перевернутый вверх ногами.
Вращение
Вы можете поворачивать свое изображение, при этом его не трансформируя.
Это можно сделать нажав Ctrl +. Если вы используете нампад, то нажимайте Ctrl + 4, вращать в другую сторону можно соответственно сочетанием Ctrl + 6.
Для вращения мышкой есть 2 варианта подключения: Shift + Space и Shift + центральная кнопка мыши. Отменить режим ротации можно кнопкой 5. Как вариант, этот режим можно вызвать напрямую с панели, нажав Вид - Холст…
Докеры
Многие опции в Крите распределены по отдельным функциональным панелям которые и называют Докерами (иногда сокращенно Докс).
Докеры это небольшие окошки в которых находиться какая-то отдельная функция - например, палитра цветов, набор кистей или стопка слоев. Их нужно воспринимать как отдельные инструменты художника - палитру, стакан воды, ящик для хранения кистей.
Активировать их можно зайдя во вкладку Настройки - Настроить панели инструментов. Тут вы увидите длинный список доступных опций.
Докеры можно перемещать нажав на кнопку х в верхнем правом углу самого окошка докера.
Вы можете сделать из докеров что-то наподобие рамки, расположив окошки вдоль границы всего холста. По мере углубления своих навыков работы в Krita вы будете открывать для себя все большее количество полезных моментов, скрытых внутри каждого докера.
Если ваш компьютер используете не только вы для работы в Крите, то вы можете сохранить нужную настройку рабочей среды. Если вы хотите закрепить докеры на рабочей поверхности, чтобы не передвинуть их случайно, нажмите Ctrl перед началом работы.
Все о Krita 4.4.8 на русском
Krita – профессиональный бесплатный растровый графический редактор на русском языке для художников и иллюстраторов, использующих графические планшеты в процессе создания цифровой живописи.
Навигация
Художники - это люди с обостренным чувством прекрасного. Поэтому организация рабочего пространства для них тоже является актом творчества. А у Криты широкий выбор вариантов организации рабочего пространства!
Всплывающая палитра

Всплывающая палитра - это уникальная фишка криты. Целью ее создания было повышения производительности. Выглядит как меню круглой формы с быстрым доступом к выбору кистей, к основному рабочему цвету и цветам переднего и заднего плана, и может вызываться прямо в процессе рисования. Просто кликните по холсту правой кнопкой мыши - и на месте курсора появится круглое меню быстрого доступа.
Его вы также можете настроить, добавляя отдельные блоки. Чаще пользуетесь чернильной ручкой, чем обычным карандашом? Замените одно другим и сохраните, чтобы при следующих вызовах меню получить обновленный вариант. Также вы можете вставить сюда уже сохраненные пресеты. Стандартное окно палитры рассчитано на выбор из 10 функций, но если вам нужно большее количество, то зайдите в Настройка - Настроить Krita - Общие - Количество Пресетов Всплывающей Палитры.
Приложение для рисования Krita. Все о программе

Системные требования
- Частота процессора- 2200 мГ и больше.
- Оперативная память- 1024 Мб и больше.
- Видеопамять на видеокарте 64мб и лучше.
- Свободного места на диске не менее 2048 Мб.
- Операционная система- Windows, macOS, Linux и другие.
Несомненными преимуществами Krita- это ее кроссплатформеность и бесплатное распространение. Данные факторы очень важны для начинающих художников, которым необходимо прокачивать навыки, а средств купить лицензионное программное обеспечение нет. Постоянные обновления избавляет от багов, а пользователи вносят свои предложения и коррективы, что положительно влияет на популярность и качество программы.
Как настроить?
- Windows;
- macOS;
- Linux и другие.
И способна вычислить восемь форматов, а создавать и сохранять в шести.
- Если у вас операционная система Windows, то скачайте архив с официального сайта.
- Перед тем, как работать, рекомендуется посмотреть несколько обучающих видео, которые есть в свободном доступе, чтобы правильно определить какой размер холста вам нужен, какие наборы кистей, какие обновления понадобятся на первое время.
- Файл установки абсолютно стандартный. Распакуйте архив в указанную папку, далее кликните по инсталлятору и дождитесь конца загрузки.
- После запуска редактора выберите язык интерфейса и создавайте холст для творчества.
Notes:

A. Simple greyscale from white to black, non linear and not equally split, just the visually good greys I like. B. A block of personal shortcuts:
top: A gradient from pale yellow to grey-violet: for tinting grey artwork with a subtle hue.
bottom: the C0C0 grey I use for background paper, a icy blue I like to sketch when on white background, two good color for quick shading with multiply, and a dark-red for inking. C. Rainbow color, but not pure RGB eyes agression. This one are balanced, and plays well together, as you can see. D. A set of color sorted as a full set of gouaches. Not too saturated, not full of grey. Just pure good looking colors.
Krita: Иллюстрированное руководство начинающего художника

В 2014 году Тайсон Тан (Tyson Tan) создал иллюстрированное руководство для начинающих пользователей Krita (растровый графический редактор, часть проекта Calligra/KOffice):

Благодаря переводу Георгия Сыпченко это руководство стало доступным на русском:
Load the palettes:
After installation, two palettes are added deevad and deevad-mini. The main one, deevad-mini, is a 9 columns version for the palette docker. The other one deevad is a funny hack to fill the Select a color dialog of Krita 3.1.2 with a 18 column version. I expect this latest version will disappear in time when the Select a color dialog will rescale automatically palettes.
Load deevad-mini on the palette docker:
1. Restart Krita.
2. Open a new document ( a lot of functionality of Krita are locked without a document ).
2. If you don't have the palette docker visible, Go to Settings > Docker > Palette to toggle the visibility of the docker.
3. On the bottom left of the docker, you'll find a colorful icon to load the palette. Select 'deevad-mini'. Load deevad on the Select a color dialog:
1. Click on the foreground color icon in the top toolbar (in green under 'View' on the screenshot above) the dialog will pop-up.
2. Click on the button Add/Remove Colors
3. Use the top list button to select deevad
Как пользоваться для начинающих и начать рисовать?
Скорее всего мышкой вам рисовать будет неудобно, ведь большинство художников пользуются для рисования специальный графический планшет, который позволяет учитывать не только направление движения, но и силу нажатия.
С чего нужно начать:
Download:
Посмотреть палитры рисовалки крита все какие есть

Ниже находится список хоткеев, которые я использую.
B кисть
E ластик
[ размер кисти (также можно с Shift и ЛК)
] размер кисти (также можно с Shift и ЛК)
K темнее цвет
L светлее цвет
/ переключение между пресетами
4 5 6 визуальный поворот холста
V линия, с Shift горизонтальная, вертикальная линия.
Ctrl+T transform tool
Ctrl+c, Ctrl+v копировать, вставить
Масштабирование:
1 100%
2 вместить рисунок в экран
3 вместить рисунок в экран по ширине
x- поменять местами передний и задний план цвета
ins новый слой
del очистить слой
Работа с шейпами:
Shift - ровные, правильные линии (сделать из круга эллипс и т.п.)
Alt - перенести фигуру при создании
CTRL - из центра
Чтобы выделить слой по объекту нажмите на клавиатуре букву R и, удерживая ее, тыкните на нужное место мышкой. Только на английской раскладке, у меня на русской не срабатывает.
Backspace - залить выделенную область цветом заднего плана
Shift+Backspace - залить выделенную область цветом переднего плана.
License:
This palettes are licensed under the Creative Commons Attribution 4.0 to "David Revoy, www.davidrevoy.com". This attribution is necessary in case of redistributing, commercializing, or modifying the palettes. This attribution is not necessary in case of usage (you can paint any artwork you want with it, you still own totally your artwork). This attribution is not necessary in case of doing screenshot/screenrecording of Krita and have the palettes visibles.
Ползунки
Чтобы облегчить работу таких функций как Сатурнация, Размер кисти, Плавность, Размытие, Шум и тому подобных, очень удобно использовать ползунки. Пример:

Уровень величины показателей обычно увеличивается передвижением полоски слева направо. Голубая область полоски показывает текущее значение. Сдвигая полоску влево вы уменьшаете текущий показатель, вправо- увеличиваете. Изменить значение также можно кликнув в любом месте ползунка.
Чтобы задать конкретное значение нажмите по ползунок правой кнопкой мыши. Если вы хотите плавно увеличивать показатели, то зажмите Shift, а если вам нужно проверить какой эффект дадут по очереди целые числа, то зажмите Ctrl (инкрементный шаг увеличения будет равен 5).
Читайте также: